
Flat spot acceleration: diagnosis and fixes for Northern Ireland drivers
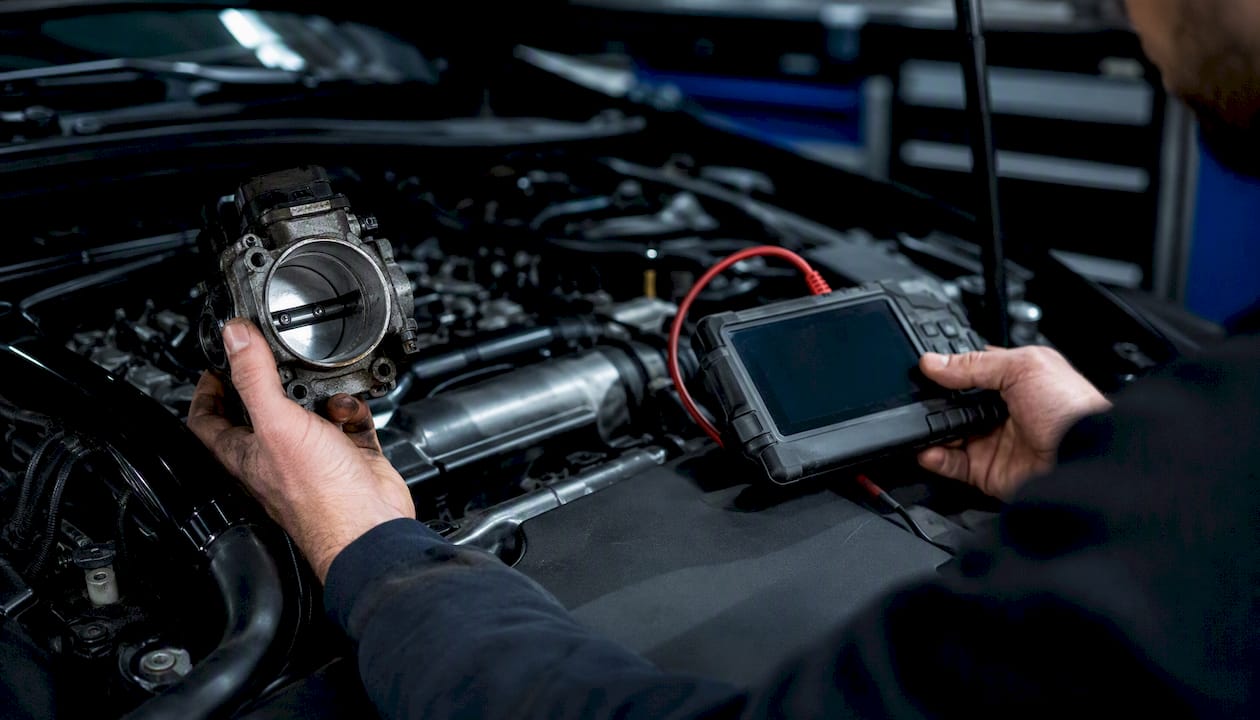
A flat spot on acceleration is a momentary hesitation or stumble when you press the throttle, where the engine briefly fails to respond before power arrives. The technical term is engine hesitation, and it points to a fault in ignition, fuel delivery, airflow sensing, or vacuum integrity. Your single most useful first action is to plug in an OBD2 scanner and read any stored or pending fault codes before touching anything else.
Before you do anything else:
Is it safe to drive? If the engine is misfiring heavily, the malfunction indicator lamp (MIL) is flashing, you smell fuel, or power loss is severe, stop driving and arrange recovery.
Immediate checks: Note exactly when it happens (cold start, warm engine, light throttle, heavy throttle) and film it on your phone. That 30-second clip is more useful to a technician than a verbal description.
When to stop driving immediately: Flashing MIL, smoke from the engine bay, a strong fuel smell, or the car entering limp mode are all reasons to pull over safely and call for assistance.
Key takeaways
A flat spot on acceleration is an engine hesitation fault, and the single most useful first step is live-data logging during the actual event, not just a parked fault-code scan.
Point | Details |
What a flat spot is | A momentary engine hesitation under throttle, caused by ignition, fuel, airflow, or boost faults. |
First diagnostic action | Run an OBD2 scan, then log live data (MAF, fuel trims, misfire counters) while reproducing the fault. |
Top three causes to check | Spark plugs or coils, MAF sensor contamination, and boost or vacuum leaks on turbocharged cars. |
When to stop DIY | Flashing MIL, fuel smell, smoke, limp mode, or severe power loss means stop driving and get professional help. |
Remap sequencing | Diagnose and repair all mechanical faults before any remap; Performancetuningni includes a health check before writing any map. |
Table of Contents
What causes a flat spot during acceleration?
Hesitation on acceleration usually points to one of several systems: ignition, fuel delivery, airflow sensing, throttle body, boost circuit, vacuum integrity, or the exhaust. The tricky part is that many of these faults feel identical from the driver’s seat. Matching the pattern of the hesitation to a likely cause is the fastest way to prioritise your tests.
Common causes at a glance:
Ignition faults: Worn spark plugs, failing coil packs, or deteriorated HT leads cause misfires that feel like a flat spot, particularly under load.
Fuel delivery problems: A weak fuel pump or clogged fuel filter that passes a static pressure check can still collapse under demand.
Dirty or faulty MAF sensor: A contaminated mass airflow sensor sends incorrect data to the ECU, causing a lean stumble during acceleration.
Throttle body deposits: Carbon build-up on the throttle plate disrupts airflow at low throttle openings.
Boost or turbo leaks: Split intercooler hoses or a faulty wastegate actuator on turbocharged cars cause a flat spot as boost pressure bleeds away.
Vacuum leaks: A cracked hose or failed gasket introduces unmetered air, leaning out the mixture under load.
Carburettor faults: On older cars, a worn accelerator pump or incorrect float level causes a classic flat spot on tip-in.
Clogged catalytic converter: Exhaust restriction causes sustained power loss, particularly at higher revs.
Transmission or clutch slip: Not an engine fault, but clutch slip under load mimics a flat spot convincingly.
Symptom-to-cause quick reference
Symptom pattern | Most likely cause | First test to run |
Hesitation only when cold, clears when warm | Coolant temp sensor, enrichment fault | Check coolant temp sensor live data |
Stumble under heavy throttle only | Fuel pump or clogged filter | Fuel pressure test under load |
Flat spot at light throttle, all temperatures | Throttle body deposits, TPS fault | Clean throttle body; check TPS sweep |
Hesitation with hissing noise (turbo car) | Boost leak, split intercooler hose | Pressurise boost circuit, listen for leaks |
Misfire-style stumble, MIL on | Ignition coil, spark plug, or injector | OBD2 scan for misfire codes (P030x) |
Power loss that worsens at high revs | Clogged catalytic converter | Exhaust back-pressure test |
Hesitation only when A/C is on | Idle control, throttle body calibration | Check idle control valve and TPS |
A symptom-pattern approach like this helps you avoid replacing parts at random and gets you to the actual fault faster.
How to diagnose a flat spot: the step-by-step workflow
Systematic diagnosis saves money. The sequence below moves from free and easy to progressively more involved.
Run an OBD2 scan first. Connect a scanner (a basic ELM327 Bluetooth adapter and a phone app such as Torque Pro costs around £15–£25) and read all stored and pending codes. Note misfire codes (P030x series), fuel trim codes, and any sensor faults. Bear in mind that many hesitation causes never set a permanent code; a clean scan does not mean a clean bill of health.
Log live data while reproducing the flat spot. This is the most diagnostic step you can take. Record these channels simultaneously during a road test:
MAF sensor output (g/s) — a sudden drop or flatline during acceleration points to MAF failure
Short-term and long-term fuel trims (STFT/LTFT) — positive LTFT above +10% indicates a lean condition
Misfire counters per cylinder — isolates which cylinder is misfiring
Throttle position sensor (TPS) — confirms the signal is smooth and proportional
MAP or boost pressure — a boost drop during a pull on a turbo car confirms a leak
Fuel pressure (if you have a gauge port) — watch for pressure drop under load
Fuel pressure test under load. A static fuel pressure check at idle can pass while the pump is actually failing under demand. Fit a mechanical gauge to the fuel rail and hold the engine at 3,000 rpm or road-test with the gauge in view. Pressure that drops sharply under throttle points to a weak pump or blocked filter.
Spark and ignition check. Swap suspect coil packs between cylinders and re-scan for misfire codes. If the misfire follows the coil, the coil is faulty. Check plug condition: heavy carbon fouling, erosion, or oil contamination are all visible.
Vacuum smoke test. Connect a smoke machine to the intake and pressurise the system with the engine off. Any smoke escaping from a hose, gasket, or throttle body confirms a vacuum leak.
Throttle body sweep. With a scanner connected, slowly open the throttle by hand (engine off, ignition on) and watch the TPS voltage. It should rise smoothly from roughly 0.5 V to 4.5 V with no flat spots or jumps.
Pro Tip: Always reproduce the fault during live-data logging rather than scanning at rest. A fault that only appears at 3,000 rpm under load will not show itself at idle in a car park.
Decision forks from live data:
LTFT spiking positive (+10% or more): lean condition — check MAF, vacuum hoses, fuel pressure.
MAF reading flatlines or drops suddenly during acceleration: MAF sensor failure or contamination.
Misfire counter climbing on one cylinder: coil, plug, or injector fault on that cylinder.
Boost pressure dropping mid-pull: boost leak, wastegate fault, or turbo control solenoid.
DIY checks and fixes you can safely try at home
Several of the most common causes of hesitation on acceleration are genuinely within reach of a competent home mechanic. Work through these before spending money at a garage.
Air filter (Difficulty: Easy | Tools: screwdriver | Cost: £10–£25 | Time: 15 minutes) A blocked air filter starves the engine of air and causes a lean stumble. Pull it out and hold it up to the light. If you cannot see light through the element, replace it. This is the cheapest fix on the list.

MAF sensor cleaning (Difficulty: Easy | Tools: MAF cleaner spray, screwdriver | Cost: £8–£15 | Time: 20 minutes) Disconnect the MAF sensor, spray the sensing wires with dedicated MAF cleaner (not brake cleaner), allow it to dry fully, and refit. Cleaning a dirty MAF sensor frequently resolves lean stumbles without needing a replacement part. Do not touch the sensing wires with anything solid.
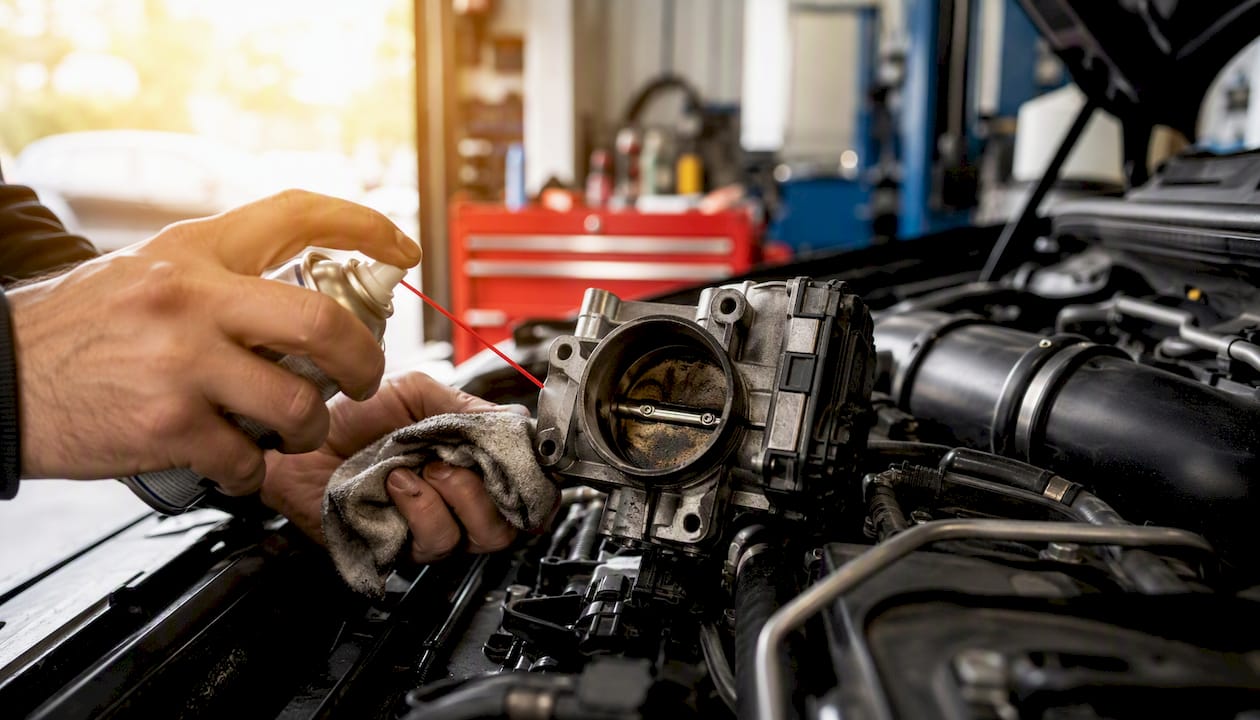
Throttle body cleaning (Difficulty: Easy–Medium | Tools: throttle body cleaner, rags, screwdriver | Cost: £8–£20 | Time: 30–45 minutes) Carbon deposits on the throttle plate cause hesitation at light throttle openings. Remove the intake hose, spray cleaner onto the plate, and wipe clean. On drive-by-wire cars, perform a throttle body relearn procedure with a scanner afterwards.
Spark plugs (Difficulty: Easy–Medium | Tools: plug socket, torque wrench | Cost: £20–£80 depending on type | Time: 30–90 minutes) Worn or fouled plugs are a primary cause of misfires and flat spots. Check the service interval for your car; most modern engines specify iridium or platinum plugs at 40,000–60,000 miles. Inspect the old plugs: heavy black carbon suggests rich running or oil burning; white or grey deposits suggest lean running.
Ignition coils and HT leads (Difficulty: Medium | Tools: screwdriver, coil puller | Cost: £20–£60 per coil | Time: 30–60 minutes) Swap coils between cylinders and re-scan. If the misfire moves with the coil, replace it. On older cars with HT leads, inspect for cracks, corrosion at the terminals, and carbon tracking.
Fuel filter (Difficulty: Medium | Tools: varies | Cost: £15–£50 | Time: 30–60 minutes) On cars with an accessible inline filter, replacement is straightforward. Relieve fuel system pressure first. Many modern cars have the filter integrated inside the fuel tank, which is not a DIY job.
Vacuum hoses (Difficulty: Easy | Tools: none | Cost: £5–£20 | Time: 20 minutes) Inspect every rubber hose connected to the intake manifold for cracks, splits, or loose clips. Squeeze them; old rubber cracks under pressure. A can of carb cleaner sprayed around joints while the engine idles will cause a brief rpm change if it is drawn into a leak.
When DIY will not fix it: An in-tank fuel pump, a clogged catalytic converter, an internal injector fault, or a failing crankshaft position sensor all require professional tools or significant disassembly. If the above checks draw a blank, book a garage.
Classic and carburettor-equipped cars: specific flat spot causes
On carburetted engines, the flat spot on tip-in is a well-known phenomenon with its own set of causes, none of which will show on an OBD2 scanner.
Carburettor flat spots are most commonly caused by a worn or incorrectly adjusted accelerator pump, float level problems, or choke faults. The accelerator pump is the key component: it squirts a small shot of fuel into the venturi when you open the throttle quickly, bridging the gap before the main circuit catches up. When the pump diaphragm splits, the pump cam wears, or the jets block, that shot of fuel disappears and you get a classic flat spot on every quick throttle opening.
Checks to run on a carburetted car:
Accelerator pump action: Remove the air filter and look down the carb throat while opening the throttle quickly. You should see a clear, strong squirt of fuel. A weak dribble or nothing at all confirms pump failure.
Float level: An incorrect float level causes either a rich or lean condition. Check against the manufacturer’s specification with a depth gauge or by observing fuel level in the bowl.
Needle valve: A worn needle valve allows fuel level to fluctuate, causing inconsistent mixture.
Choke behaviour: A choke that stays partially closed when warm richens the mixture and can cause stumbling. Check that it opens fully once the engine reaches operating temperature.
Vapour lock: On hot days or after a hot soak, fuel in the float bowl can vaporise, causing a flat spot that clears once the engine cools slightly. Insulating the fuel line or fitting a heat shield around the carb helps on susceptible cars.
Accelerator pump remedies: Replace the pump diaphragm (a common service item, typically £5–£20 for a rebuild kit), check the pump cam for wear, and clear the pump jet with carb cleaner. On twin-choke carbs, both pump circuits need checking.
Flat spots on turbocharged engines: boost leaks and control faults
Turbo cars have an additional layer of complexity. The flat spot often occurs at the point where boost is building, then suddenly the power delivery goes flat or surges erratically.
Boost leaks from split intercooler pipes or hoses are among the most common causes of flat spots on turbocharged cars. A hissing noise under hard acceleration, oil residue around hose clamps, or a boost gauge that peaks then drops suddenly are all strong indicators.
Common turbo-specific causes:
Split or loose intercooler hose or boost pipe
Faulty wastegate actuator (stuck open causes low boost; stuck closed causes overboost and cut)
Intercooler core restriction or internal contamination
MAF or MAP sensor misreading during spool-up
Turbo control solenoid fault (N75 valve on VAG cars, for example)
Boost pressure sensor failure
Quick tests for boost-related flat spots:
Listen carefully during a hard pull for a hiss, whoosh, or flutter that coincides with the flat spot.
With the engine cold and off, pressurise the boost circuit using a low-pressure tyre inflator or dedicated boost leak tester (available for around £20–£40). Block the turbo inlet and pressurise to around 10–15 psi. Listen and feel for escaping air at every hose join and clamp.
Fit a boost gauge (mechanical or via OBD2 live data) and watch the pressure trace during a pull. A boost spike followed by a sudden drop confirms a leak. A boost level that never reaches the expected figure suggests a wastegate or solenoid fault.
Inspect all hose clamps and the intercooler end tanks for oil residue, which indicates boost gas carrying oil vapour through a leak point.
A critical rule: repair mechanical boost faults before considering a remap. A remap can adjust boost targets and delivery curves, but it cannot seal a leaking hose. Remapping over a boost leak risks running the engine lean under load.
When to stop DIY and book a professional
Some faults are beyond safe home diagnosis, and some symptoms mean you should not be driving the car at all.
Stop driving immediately if:
The MIL is flashing (not steady) — this indicates an active misfire severe enough to damage the catalytic converter
You smell fuel inside or outside the car
There is smoke from the engine bay
The car has entered limp mode (restricted power, often with a steady MIL)
Power loss is sudden and severe rather than a momentary hesitation
Drive carefully to a garage if:
The hesitation is mild and intermittent, the MIL is steady (not flashing), and no other warning lights are present
The car runs normally except for the flat spot under specific conditions
What a professional diagnostic session typically involves:
A competent workshop will connect a professional-grade scanner (such as a Snap-on or Autel unit with live-data logging), perform a road test while recording all relevant channels, run a fuel pressure test under load, and may use a smoke machine for vacuum and boost leak testing. On diesel cars, injector return-flow testing and diesel-specific live data are standard.
Ballpark UK cost bands for common repairs:
Spark plugs and coils: £80–£250 fitted, depending on cylinder count and access
MAF sensor replacement: £80–£200 fitted
Fuel pump replacement (in-tank): £200–£500 fitted
Intercooler hose repair or replacement: £50–£200 fitted
Catalytic converter replacement: £300–£900+ fitted, depending on vehicle
Diagnostic labour: typically £50–£100 per hour; a thorough diagnostic session usually takes one to two hours
A clogged catalytic converter sits at the expensive end of this list and is rarely a DIY repair. If the exhaust back-pressure test confirms restriction, budget accordingly.
Routine maintenance to prevent flat spots
Prevention is cheaper than diagnosis. Most flat spots are the result of deferred maintenance rather than sudden component failure.
Maintenance checklist for UK drivers:
Spark plugs: Replace spark plugs at the manufacturer’s recommended interval, which varies by engine type and use.
Air filter: Check at every oil service. Replace annually or every 12,000–15,000 miles in normal UK driving conditions; sooner if you drive on dusty roads.
Fuel filter: Replace every 20,000–30,000 miles where the filter is accessible. Many modern cars have a lifetime filter in the tank, but “lifetime” assumes clean fuel and a healthy pump.
MAF sensor cleaning: Clean the MAF sensor at every major service using dedicated MAF cleaner spray. It takes ten minutes and costs under £10.
Throttle body cleaning: Every 30,000–40,000 miles, or sooner if you notice idle quality deteriorating.
Fuel tank level: Keeping the tank above a quarter full reduces the risk of the in-tank pump drawing sediment and running hot, which shortens pump life.
Injector cleaning: On higher-mileage cars (above 60,000 miles), a professional injector clean or engine carbon clean removes deposits that cause hesitation and poor throttle response.
Vacuum hose inspection: Check rubber hoses for cracking at every service. They degrade with age and heat cycling regardless of mileage.
Can an ECU remap cure or worsen a flat spot?
This question comes up regularly, and the honest answer is: it depends entirely on the cause.
A remap adjusts the ECU’s fuelling maps, ignition timing, and boost targets. If the flat spot is caused by an overly conservative factory map (common on turbocharged diesel cars where the manufacturer has deliberately limited throttle response), a well-executed remap can genuinely improve throttle response and eliminate the hesitation. Understanding what remapping actually changes helps set realistic expectations here.
If the flat spot is caused by a worn spark plug, a leaking boost hose, or a failing MAF sensor, a remap will not fix it. In some cases, a remap that increases boost or fuelling demand will make a marginal mechanical fault worse, not better.
Rules to follow before considering a remap:
Diagnose and repair all mechanical and sensor faults first. A remap on a car with a boost leak or a weak fuel pump is money wasted.
A responsible remap provider will perform a pre-tune health check, log live data before touching the map, and road-test after. Walk away from anyone who plugs in and writes a map in ten minutes without checking the car first.
For UK vehicles, the remap must respect MOT emissions limits. Do not remove or disable emissions equipment. A remap that causes the car to fail its MOT emissions test creates a legal and financial problem.
Economy remaps can improve throttle response and fuel efficiency simultaneously on diesel engines, but only when the engine is mechanically sound.
The correct sequence: diagnose → repair hardware → clean carbon if needed → remap.
What actually happens in a real diagnostic case
The most common pattern in a workshop is this: a car arrives with a hesitation complaint, the owner has already replaced the spark plugs, and the fault is still there. Nine times out of ten, the scan reveals either a lean fuel trim condition or a MAF sensor reading that drops during acceleration. A MAF clean or replacement, combined with a vacuum hose inspection, resolves it. The plugs were not the problem, but they needed doing anyway.
The second most common scenario on turbocharged cars is a boost leak that the owner had not noticed because it only opens under load. A smoke test or a boost-pressure test during a road pull finds it in minutes.
What owners consistently underestimate is how much information live-data logging provides. A parked scan tells you what codes the ECU has stored. Live data during the actual fault tells you why. The gap between those two things is where most misdiagnosis happens, and it is why a thorough diagnostic session with a professional scanner is worth the labour cost before committing to expensive parts.
Performancetuningni can diagnose and remap your engine
If you have worked through the DIY checks and the flat spot is still there, or if you would rather have a professional handle it from the start, Performancetuningni offers a full diagnostic-to-remap workflow for petrol and diesel vehicles across Northern Ireland.
[

The process starts with a pre-tune health check: live-data logging, a road test, and a thorough inspection before any map is written. If the car needs mechanical work first, the team will tell you clearly rather than remap over a fault. Where carbon build-up is contributing to the hesitation, engine carbon cleaning can be combined with a remap in a single appointment. Bring a phone video of the symptom and any recent service history; the workshop provides before-and-after data logs so you can see exactly what changed.
Turnaround for a diagnostic session is typically half a day; a remap with carbon clean is usually a full day. To see what your vehicle could gain and start the booking process, use the free remap calculator or visit the remapping service page for full details.
Sources
Recommended